Cleaning your computer from dust is essential for maintaining its performance and preventing overheating. Here’s a step-by-step guide to help you clean your computer safely and effectively:
1. Gather Your Supplies
- Compressed air canister
- Microfiber cloth
- Soft brush (optional)
- Screwdriver (if needed to open the case)
- Isopropyl alcohol (for cleaning surfaces)
2. Prepare Your Computer
- Turn Off and Unplug: Always power down your computer and disconnect all cables.
- Take It to a Well-Ventilated Area: If using compressed air, do this outside or in a well-ventilated space to avoid spreading dust indoors.
3. Open the Case (Desktop)
- If you have a desktop computer, use a screwdriver to remove the side panel. Laptops usually have fewer access points and might not need to be opened fully.
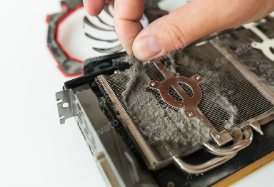
4. Dust Removal
- Use Compressed Air: Hold the can upright and use short bursts of air to blow dust off components like fans, heatsinks, and vents. Keep the can a few inches away to prevent moisture buildup.
- Soft Brush for Stubborn Dust: If some dust remains, use a soft brush to gently dislodge it.
5. Clean the Exterior
- Wipe down the case with a microfiber cloth. You can use a small amount of isopropyl alcohol on the cloth for cleaner surfaces.
- Don’t forget to clean the screen if using a laptop, using a screen-safe cleaner.
6. Reassemble and Power On
- If you opened up your desktop, replace the side panel and secure it with screws. Reconnect all cables and power up your computer.
- Check that all fans are running properly and listen for any unusual sounds.
7. Regular Maintenance
- Schedule regular cleanings, ideally every 3-6 months, depending on your environment (more frequently if you’re in a dusty area).
- Keep your workspace clean to minimize dust accumulation.
If you experience persistent overheating or performance issues, consider consulting with a professional for further diagnosis.